
Specialist certification, in person in Edmonton
Wigs & Weave Installation Specialist
This is the highest-ticket service on a braider’s menu. It is also the one with the most to get wrong. So this certification puts safety and consumer protection before technique, not after it.
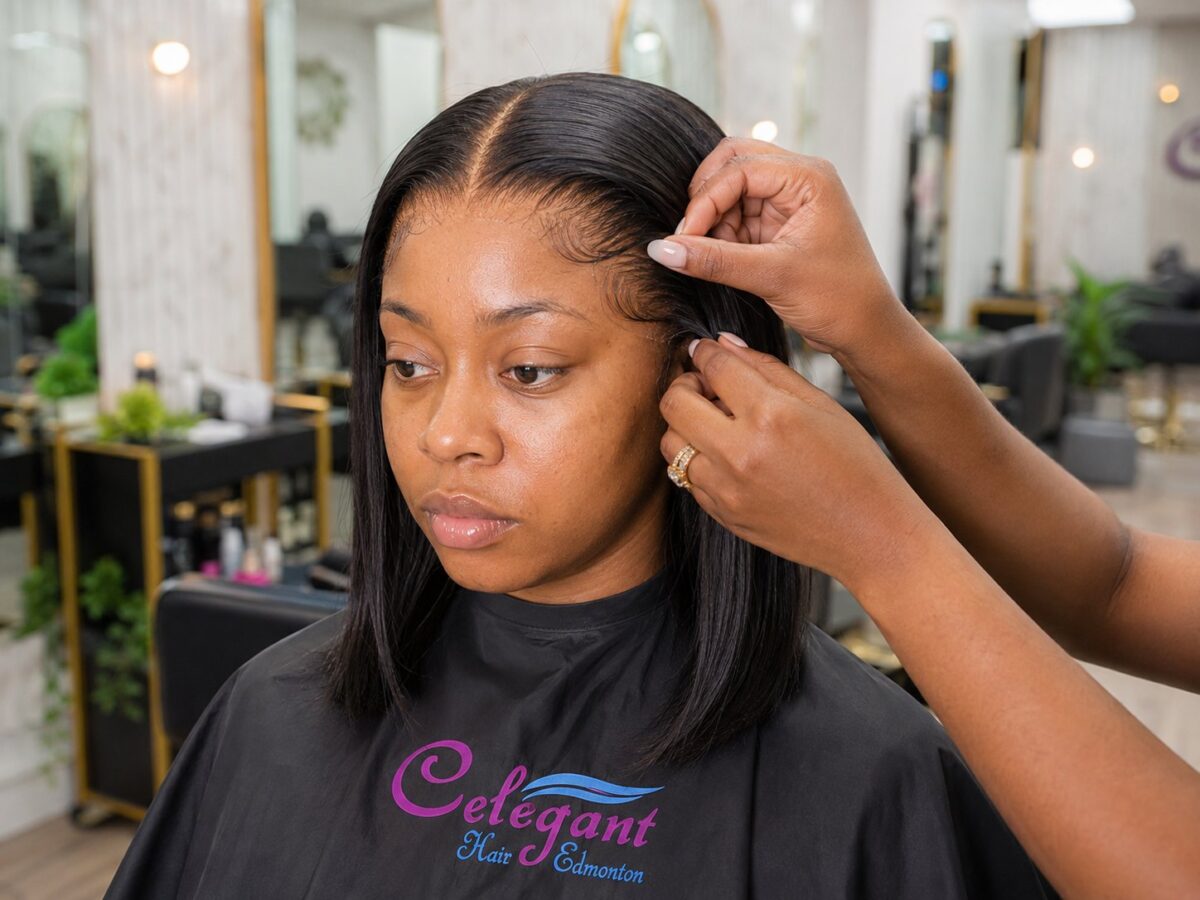
A sew-in or a wig install sits against a client’s scalp and hairline for weeks, sometimes with adhesive on the most fragile hair on their head. Done carelessly it causes traction loss, reactions and breakage. Done properly it is the service clients rebook most often and pay the most for.
Safety comes before technique here
You will learn a real patch test and a full tool-sanitation routine in the first week, and your instructor will watch you perform both.
A patch test you have actually performed
Before any product goes near skin. You learn the procedure, how to read a reaction early, and the circumstances where adhesive is simply the wrong choice for that client.
Tool and hair hygiene, signed off
Sanitising tools, cleaning and handling new and reused hair. Performed in front of your instructor rather than described on a slide.
Glueless as the default method
Elastic bands, adjustable straps, combs, a flat lay with no melt required. That is where the industry has moved and it is what protects edges.
Knowing your limits
When a client’s scalp or edge condition means you adjust the plan, decline the install, or refer them to a medical or licensed professional instead.
Then, on that foundation: braid-downs, the flat cornrow base an install is sewn onto, then sew-ins, closures, frontals, wig construction, customisation and maintenance.
Why students choose Celegant
- Safety and consumer protection taught first, and scored in the capstone
- Glueless is the default method, adhesive is a supervised exception
- You build a wig from the cap up, not just install one
- A professional skills certificate, not a cosmetology credential
Course facts
- Level
- Specialist. Open to experienced braiders and to Foundations graduates
- Format
- In person, Edmonton
- Language of instruction
- English
- Duration
- 9 weeks, 5 modules, 26 lessons
- Schedule
- Thursdays and Fridays, 3:30pm to 6:30pm
- Class size
- Maximum 8 students, 2 instructors
- Location
- Unit 316, 8925 51 Ave NW, Edmonton, AB T6E 5J3
- Contact hours
- 54 supervised hours
- Kit
- Mannequin head with human hair, tripod stand, hair clips, rat tail comb and braiding hair, included at no extra cost
- Certificate
- Professional Specialist Certificate in Wigs and Weave Installation
- Tuition
- $1,997 CAD
- Next intake
- 1 March 2027
Default install method: glueless and edge-safe. Adhesive is taught as a supervised exception, not the norm. You practise on a mannequin or wig block. Assessment is a five-part capstone in the final week, including a scored safety component.
To complete the certification you need at least 80% attendance and at least 70% on your assessments, which are assignment based. There is no deposit. You can pay in full, or split the cost into 4 interest-free instalments with Afterpay at the Square checkout, at no extra cost to you.
Tuition, published openly
$1,997CAD
- Early-bird $1,497 first 5 registrations, code WIGSANDWEAVES at checkout
- Pay in full, or split it into 4 interest-free instalments with Afterpay at the Square checkout
- $37 per supervised contact hour
That per-hour figure buys the highest-ticket service category in the business, taught with the safety content given the same unhurried time as the technique.
What you will be able to do at the end
Take a client from consultation to a finished, natural-looking install, and know when to say no.
- Run a client-safety check before any install, covering tension, a patch test where relevant, a scalp check and hygiene, and perform a patch test and a full tool sanitation routine correctly, because your instructor watched you do it
- Braid the four foundation patterns installs actually require: versatile, closure, leave-out, and frontal or 360
- Sew a flat, secure, well-spaced stitch that holds a weft without lumps or lifting, and lock off and restart a thread invisibly
- Lay wefts for natural fall and graduated fullness, cut and seal them to fit curves and the nape
- Install and customise a closure, plucking for natural density, creating a believable part and crown, and laying it flat so it does not bubble
- Apply a frontal glueless, using an elastic band and adjustable straps, and customise the hairline with plucking and baby hairs
- Blend a leave-out or closure so the install reads as one head of hair
- Build a wig from scratch: measure, cap, weft, attach a closure or frontal, secure combs and band, and quality-check the finished unit
- Customise lace through plucking, safe knot bleaching and tinting, and know when less customisation is the better call
- Use adhesive safely and appropriately, including patch-testing, minimal application, correct removal, and when to refuse
- Maintain, wash and refresh installs and units, and take them down without damaging edges
- Price the full lifecycle, install, hair, customisation and maintenance, as separate line items
- Leave with a verifiable Professional Specialist Certificate in Wigs and Weave Installation
Who this certification is for
You want the highest-ticket service on the menu. Sew-ins, closures, frontals and unit installs are what clients pay most for and rebook most often. This is the track that gets you there.
You already braid and clients keep asking for installs. You have the cornrow base. What you do not have is the stitch, the closure customisation, the blend and the safety literacy, which is exactly the gap this fills.
You are a licensed stylist whose training skipped this. Diploma programs across this province teach cutting, colour and chemical services. Very few teach braid-downs, closures, frontals or textured-hair install work. Your clients notice.
You sell units and want to make them. Module 4 teaches wig construction from the cap up. Made-to-order units are their own revenue stream, separate from install fees.
You use glue because you were never taught anything else. Glueless is the default in this course, with elastic bands, adjustable straps and a flat lay that needs no melt, and you will learn adhesive properly enough to know when not to reach for it.
You have had a client react and it frightened you. Then the safety lesson in module 1 is the reason to take this course. Patch testing, reading a reaction, sanitation, scalp health under an install, and knowing when to refer someone to a medical professional rather than install.
New to this? If you cannot yet braid a flat cornrow, we would point you at the Celegant Foundations In-Person Braiding Intensive first. It is our recommended starting point for beginners, not a gate. There is no entry requirement for this certification. If you already braid to a professional standard, you can apply straight to it, and if you are not sure which is right for you, come and talk to us.
Skills and services this certification covers
Set out separately, rather than lumped together as “wigs and weaves”.
Foundation preparation
- Versatile braid pattern, giving multi-directional parting freedom
- Closure foundation with correctly sized reserved space
- Leave-out foundation, with the leave-out hair protected
- Frontal and 360 foundations with a flat, edge-safe perimeter
- Client mapping: head shape, density, edge condition and goals
Sew-in services
- The sewing stitch, flat, secure and correctly spaced
- Weft placement, direction and layering for graduated fullness
- Cutting and sealing wefts to fit curves and the nape
- Closure installation and customisation
- Frontal application, glueless first
- Blending leave-out and closures into the install
- Cutting and layering to frame the face
- Styling, speed and live fault correction
Wig construction and customisation
- Wig anatomy: cap, closure or frontal, wefts, combs, elastic and straps
- Measuring to the client’s head and building the cap
- Sewing wefts by machine and by hand
- Building a full, evenly distributed unit
- Lace customisation: plucking, safe knot bleaching and tinting
- Creating a natural parting and baby hairs
- Glueless installation as the default method
- Safe, appropriate adhesive use, with patch testing and correct removal
Maintenance and lifecycle
- Maintenance appointments: tightening, re-laying a closure or frontal, refreshing
- Washing a sew-in on the foundation without disturbing the install
- Scalp care under an install, and recognising when it needs to come out
- Deep conditioning and detangling units and bundles
- Restoring a worn unit, and storage and care between wears
- Safe takedown of sew-ins and of glueless and adhesive units
The curriculum, module by module
Five modules across nine weeks. Module 3, sew-ins and closures, spans three of them, because the stitch and the blend reward slow supervised repetition more than anything else in the program.
Welcome, Safety and Specialist Orientation
Week 1, first session. Safety, hygiene and consumer protection before any technique, then station, tooling and hair literacy.
- What you learn. What the credential certifies and, importantly, what it does not: this is a skill and business certification, not a cosmetology credential. Then, before any technique, safety, hygiene and consumer protection. Traction and tension safety and how install foundations damage edges. Adhesive safety: why a skin patch test matters before any glue near skin, how to read a reaction, and when glue is simply the wrong choice. Tool and hair hygiene, sanitising tools, cleaning and handling new and reused hair. Scalp health during and between installs, and recognising problems early. And knowing your limits: when to refer a client to a medical or licensed professional instead of installing. Then your station and tooling, wig block versus mannequin head, curved and C-needles, weaving thread and install combs, plus hair literacy: human versus synthetic, bundles versus wefts, closures versus frontals, and estimating what an install needs.
- Why it matters. This lesson comes first for a reason. Installs sit against the scalp for weeks. Being in a room matters here more than anywhere else in the program, because the instructor can watch your patch-test technique and your sanitation routine rather than take your word for it on video.
- What you practise. A baseline video of your current cornrow braid-down. A written client-safety checklist you would run before every install. And then you perform the patch test and the tool-sanitation routine in front of your instructor, who signs each one off.
- The professional outcome. A safety protocol you can actually run, verified by someone watching you run it.
The Braided Foundation: Braid-Downs for Installs
Weeks 1 and 2. The four foundation patterns, and client mapping that tells you when to adjust the plan or decline the install.
- What you learn. How to stop seeing cornrows as a style and start seeing them as structure. Flat, even and low-profile is the whole goal. The foundation controls how the install lies, where the hair falls, whether a closure looks natural, and how safe and comfortable the whole thing is. Then the four patterns. The versatile pattern is the workhorse, giving the client parting freedom in multiple directions, with layout, direction, beehive elements and ends sealed so nothing pokes through. Closure and leave-out foundations cover planning where the closure sits and how much space to reserve, how much natural hair to leave out and how to protect it from heat and stress, braiding so the closure or leave-out blends seamlessly, and choosing between them for a given client. Frontal and 360 foundations cover braiding the perimeter flat to anchor a frontal, the full-perimeter considerations of a 360, and perimeter edge safety, which is the highest-risk zone for traction damage anywhere in this certification. Foundation planning and client mapping covers reading head shape, density, edge condition and goals, choosing the pattern, estimating hair, and knowing when a client’s hair or scalp means you adjust the plan or decline the install.
- Why it matters. Clients judge the hair on top. Specialists know the install is only ever as good as the braids underneath. A lumpy or wrong-direction foundation shows through every single time.
- What you practise. A flat, bump-free straight-back foundation. A complete versatile pattern on a wig block. A foundation with a correctly sized closure space, and a discussion of why you sized it that way. A frontal-ready foundation with a flat perimeter.
- The professional outcome. A complete, install-ready foundation for a named install type, versatile, closure or frontal, presented from top and side with a timed braid-down.
Sew-In and Closure Services
Weeks 3 to 5, the flagship module, spanning three weeks. The stitch, weft placement, closures, frontals glueless-first, and the blend.
- What you learn, part one. The stitch first, built slowly then to speed: threading the curved needle and anchoring securely, the loop-and-lock motion that holds a weft flat, stitch spacing that is secure without over-sewing, keeping the weft flat with no lifting, and locking off and restarting a thread invisibly. Then weft placement: direction so the hair falls naturally, layering for graduated fullness without bulk at the base, leaving room for the closure or leave-out, cutting and sealing wefts to fit curves and the nape, and building fullness evenly so the install is not heavy in one zone.
- What you learn, part two. Closures, sewn in flat and secure over the reserved space, then customised through plucking for natural density, the parting, and where appropriate bleaching knots with the safety notes attached, creating a natural part and crown, laying it flat so it does not lift or bubble, and matching texture and colour to the bundles. Then frontals: sewn-in application over a frontal foundation, and then the glueless methods, elastic band and adjustable straps, which are the edge-safe default this course teaches. If adhesive is used at all: patch-testing, minimal safe use, clean removal, and when to avoid it entirely. Then hairline customisation, plucking and baby hairs for realism.
- What you learn, part three. Blending, which is the invisible art: matching leave-out to the install with heat safety in mind, blending a closure or frontal seamlessly into the wefts, colour and texture matching, and cutting and layering to frame the face. Then styling, speed and troubleshooting, covering lifting wefts, visible tracks, a bubbling closure, an unnatural hairline and tension at the perimeter, each with its cause and fix. Then the full install sequence from consult to hand-off.
- Why it matters. This is the flagship high-ticket service, and it spans three weeks because the stitch and the blend reward slow, supervised repetition more than anything else in the certification.
- What you practise. Four weft rows judged on flatness and spacing, not speed. A half-head of layered wefts. A closure sewn in and customised. A frontal applied glueless with a customised hairline and a note on your securing method. A blended, layered install photographed from its most natural angle. A styled install with an after-photo, then one fault deliberately created and corrected in front of your instructor. Then the start of a full install.
- The professional outcome. A full sew-in, with foundation, layered wefts, and a closure or glueless frontal, blended and styled to a natural finish, presented from three angles with a timed install. This is the central technical proof of the certification.
Wig Construction, Customisation and Installation
Weeks 6 and 7. Building a unit from the cap up, lace customisation, glueless installation, and adhesive treated seriously.
- What you learn, part one. A wig is a sew-in you build off the head, and once you understand cap construction you can make units to order, which is its own revenue stream separate from install fees. Wig anatomy: cap, closure or frontal, wefts, combs, elastic and straps. Measuring to the client’s head and securing the cap to the block. Sewing wefts by machine and by hand. Attaching the closure or frontal. Then building a full unit with even fullness, layering and density, securing combs and the adjustable band, finishing so the unit is flat and comfortable, and quality-checking before customisation.
- What you learn, part two. Lace customisation, which is the artistry that justifies premium pricing: plucking the hairline and part for a natural density gradient, bleaching knots safely with the product cautions and hair protection that go with it, tinting the lace to match the client’s complexion, and creating a natural parting and baby hairs, alongside knowing when less customisation is the safer, better choice. Then glueless installation as the default: preparing the natural hair with a flat braid-down or moulded base, securing with elastic band, adjustable straps and combs, achieving a secure natural fit with no adhesive, laying the lace flat, and teaching the client to put the unit on, take it off and care for it.
- What you learn, part three. Adhesive, treated seriously: when it is and is not appropriate, contraindications, mandatory patch-testing, safe application using a skin protectant, minimal product and hairline only, complete removal with the correct remover rather than peeling, and edge and skin recovery. This lesson is delivered under direct supervision with the patch test and cautions checked live. Then styling and delivering the finished unit, and pricing unit-making and installation as separate or bundled services.
- Why it matters. Wig installs are the fastest-growing and most edge-friendly part of this specialty. A specialist who can build, customise and install units, and teach clients glueless wear, commands both a premium and a wider client base.
- What you practise. A head measured, a cap secured and the first weft rows sewn. A complete unit built and checked. A hairline plucked and customised. A glueless install over a braided base. And a written client-facing explainer on adhesive versus glueless wear, presented to your instructor as you would counsel a client.
- The professional outcome. A wig built, customised and glueless-installed on your block, with cap construction, full weft layout, a plucked hairline and a secure edge-safe install, then styled and presented.
Maintenance, Business and the Specialist Capstone
Weeks 8 and 9. The maintenance lifecycle, unit care, lifecycle pricing with a hair-cost policy, portfolio and the capstone.
- What you learn. Installs are a lifecycle service, and the revenue is in the maintenance as much as the first appointment. Maintenance appointments: tightening, re-laying a closure or frontal, refreshing the style. Washing a sew-in on the foundation without disturbing it. Scalp care under an install and recognising when it needs to come out. Safe takedown of both sew-ins and units, protecting edges. Then unit care: washing and deep-conditioning human hair units and bundles, detangling technique that prevents shedding and matting, restoring a worn unit, and storage between wears, with the synthetic versus human differences called out. Then pricing the whole lifecycle, sew-in versus closure versus frontal versus wig install versus unit-making, with customisation and maintenance as separate line items, and a hair-cost policy, pass-through or client-supplied, that protects your margin. Then portfolio: install work is the most dramatic before-and-after content in braiding, and the shots that sell it are the foundation, the hairline, the blend and the transformation.
- Why it matters. A one-time install is a transaction. A maintained install is a client.
- What you practise. A maintenance refresh and a safe takedown on a section, before and after. A unit washed, deep-conditioned and detangled. A full install price menu with your hair-cost policy. A six-image portfolio. Then your capstone pieces.
- The professional outcome. A menu, a portfolio, a credential and a one-to-one debrief.
Read the safety protocol and the full module list
The download sets out all five modules, the four foundation patterns, the safety protocol, the tools list and the assessment standard. No payment on a first visit.
Signature techniques you will own
- The flat, secure stitch. Loop-and-lock, correctly spaced, the weft lying flat with no lifting, thread locked off and restarted invisibly. It is the single skill everything else in this certification rests on.
- The glueless frontal. Elastic band and adjustable strap methods, a secure natural fit with no adhesive, lace laid flat, hairline customised. The edge-safe default.
- Closure customisation. Plucking to a natural density gradient, a believable part and crown, laid flat so it never bubbles.
- The blend. Making added hair and the client’s own hair read as one, through texture match, colour match, heat safety and a cut that frames the face.
What you will actually be doing in the room
Safety content is given the same unhurried time as technique, and the instructor walks the room during practice so every student gets a hands-on check rather than only a visual demo.
- A written client-safety checklist, then a patch test and full tool sanitation performed and signed off in front of your instructor
- A flat, bump-free straight-back foundation
- A complete versatile braid pattern on a wig block
- A foundation with a correctly sized closure space
- A frontal-ready foundation with a flat, edge-safe perimeter
- Four weft rows judged on flatness and spacing
- A half-head of layered wefts
- A closure sewn in and customised
- A frontal applied glueless, hairline customised
- A blended, layered install photographed from three angles
- One fault created and corrected live
- A head measured, a cap secured, and weft rows sewn on
- A full wig unit built and quality-checked
- A hairline plucked and customised
- A glueless install over a braided base
- A written client explainer on adhesive versus glueless
- A maintenance refresh and a safe takedown
- A unit washed, deep-conditioned and detangled
Assessments and what you leave with
Module skills submissions. Module 2, an install-ready foundation for a named install type, timed, and module 3, a full sew-in blended and styled from three angles, are reviewed in person. Module 4 adds a built, customised, glueless-installed unit.
The final capstone, assessed in person, in five parts
- Technical. One full install, either a sew-in with foundation, layered wefts and a closure or glueless frontal, or a built-and-installed wig unit, showing a flat install-ready foundation, secure flat stitching, a customised natural hairline, a seamless blend, and edge-safe securing with glueless preferred.
- Safety. Your client-safety checklist covering tension, a patch test where relevant, a scalp check and hygiene, applied to this install, and assessed against how your instructor has observed you work throughout the course.
- Documentation. The foundation, the install in progress, the customised hairline, the blended finish from three angles, a before and after, and your total timed install.
- Service package. A mock consultation including hair selection and the adhesive versus glueless conversation, a tiered install price menu, and a personalised aftercare and maintenance sheet.
- Reflection. Your biggest improvement since the week one baseline, and the install service you most want to master next.
On passing you receive the verifiable Professional Specialist Certificate in Wigs and Weave Installation, a six-image install portfolio, a tiered price menu with customisation and maintenance as separate line items and a hair-cost policy, and a client-safety checklist and adhesive versus glueless client explainer, both written by you.
Coming back for a second specialty. 20% off your next specialty certification when you enrol within 90 days of completing one. That is a standing offer, not a launch promotion.
Tools and materials
You will be taught to use, and to sanitise, all of these:
- A wig block and stand, plus a mannequin head
- Curved and C-needles, and weaving thread
- Install combs, sectioning clips and an edge tool
- Bundles and wefts, human and synthetic
- Closures and frontals
- Wig caps, combs, elastic and adjustable straps
- Glueless install supplies, including elastic band and adjustable straps
- Adhesive and the correct remover, used only under supervision and with patch-testing
- Lace tinting and knot-bleaching products, with safety guidance
- Deep conditioning and detangling products
- Styling tools, used within heat-safe limits
- Rat-tail comb and scissors
- A camera or phone for hairline, blend and before-and-after documentation
Your kit comes with the course. Mannequin head with human hair, tripod stand, hair clips, rat tail comb and braiding hair, included at no extra cost. It is yours to keep. If you already own some of it, bring what you have and we will supply the rest.
You are given a hair and tool reference sheet. It sets out human against synthetic and blended fibre and which to choose when, the difference between a 4×4 closure, a 5×5, a 13×4 frontal and a 360, what density and lace terms actually mean at the hairline, every tool you will use and what good practice looks like with it, and how many bundles a given length usually takes. It is written to be checked mid-service, not read once.
You are also given a client safety checklist and an adhesive-versus-glueless explainer. The checklist is the two-minute scalp, hairline and tension check to run before you touch anyone, with the warning signs that mean you stop. The explainer compares the two install methods side by side on hold, risk, removal and who each suits, and is direct about why glueless is our default and when to decline the service altogether.
Schedule and location
In person only, and for this certification that matters more than any other. Patch-test technique, tool sanitation and adhesive application are exactly the kind of content a video cannot verify. Your instructor watches you do them.
The specialty certifications run two afternoons a week: Thursdays and Fridays, 3:30pm to 6:30pm. The next intake is 1 March 2027. Contact hours, class size and the address are all in the course facts above and in the footer of every page.
Finding us. Unit 316 is in building 3. It is not on a third floor. The site is single storey, so there are no stairs and no lift between the car park and the classroom. Parking is ample and includes two designated accessible spaces, and the salon and store are wheelchair accessible.
The washroom is not a wheelchair-accessible washroom. A wheelchair fits inside it, but there is not enough clearance to turn around and there are no grab bars. We would rather tell you that now than have you find out on the day.
Who teaches this

Dr. Tina
Lead Instructor
Dr. Tina is a Master Braider and the Lead Instructor of Celegant Braiding Academy. She has braided more than 3,500 clients since 2016, has run her own salon since 2015, and teaches every Academy program personally, with a co-instructor alongside her.
- Master Braider
- Braiding clients since 2016, and running her own salon since 2015
- Experienced braider and loctician
- Experienced wig maker, and wig and weave installer
- A working braider at Celegant Hair Edmonton, not only an owner
What we can say about this particular certification. Every sew-in and most wig installs are built on a braided foundation, and foundation quality is what decides whether an install lies flat, falls correctly and stays safe. That braid-down expertise is the part of this discipline Celegant is strongest in, and it is where the first two weeks of the course live.
Dr. Tina makes wigs, and installs wigs and weaves. This is not a certification she teaches out of a manual. During the Covid-19 pandemic, when the salon could not open, she taught wig making publicly on YouTube. The Celegant Hair channel has since passed 2,000 subscribers, and the work is still there to watch at youtube.com/@celeganthair.
Installs are also a daily service on the floor at Celegant Hair Edmonton, at this address. As in every in-person program, a co-instructor teaches alongside her.
Dr. Tina teaches from experience rather than from theory, with a real example behind every point, and she adapts her pace and her explanations to how each student in the room actually learns. Her approach in her own words is on the About page.
Tuition and payment
Full certification
$1,997CAD
- Early-bird $1,497 first 5 registrations, code WIGSANDWEAVES at checkout
- Pay in full, or split it into 4 interest-free instalments with Afterpay at the Square checkout
- $37 per supervised contact hour
All prices include GST. The figure above is what you pay.
No deposit, and no interest. Pay in full, or split the cost into 4 interest-free instalments with Afterpay at the Square checkout, at no extra cost to you. Afterpay is offered through Square. You choose it at the payment step inside the secure Square checkout, not on a separate page.
Funding. See tuition, instalments and funding options.
How enrolment works. Download the curriculum first. If it is right, you can reserve your seat from there. No first-visit checkout.
Questions braiders and stylists actually ask
Do you teach glue, or not?
Both, but not equally, and deliberately so. Glueless is the default method taught throughout: elastic bands, adjustable straps, combs, and a flat lay with no melt required. Adhesive gets its own lesson, delivered in a serious register and under direct supervision: when it is appropriate and when it is not, contraindications, mandatory patch-testing, safe minimal application to the hairline only, complete removal with the correct remover rather than peeling, and edge recovery. Treating glue as a tool with real risks rather than a default is the position of this course, and it is stated openly.
What is the difference between a closure and a frontal, and how do I choose?
A closure covers a smaller area, typically the part and crown, and pairs with a foundation that reserves space for it. A frontal covers the full hairline and gives far more parting versatility, and it demands a more precise foundation, especially around the perimeter where edges are most at risk. Module 2 covers the foundations for each and module 3 covers the installs. Choosing between them for a real client is part of the foundation-planning lesson.
I have had a client react to adhesive. How do I stop that happening again?
Patch test, every time, before any product goes near skin, and know what a reaction looks like early. The safety lesson in module 1 covers the procedure, the signs, and the circumstances where glue is simply the wrong choice for that client. You will perform the patch-test procedure in front of your instructor and have it signed off, and it appears again as a scored part of the final capstone.
This is educational guidance, not medical advice.
Will this stop me damaging clients’ edges?
That is the design intent of the whole course. Traction and tension safety comes before technique. Perimeter edge safety is taught as the highest-risk zone in the discipline. Glueless is the default. Foundations are taught with tension that is secure enough to sew into and gentle enough to protect edges. And you will learn to recognise when a client’s edge condition means you adjust the plan or decline the install altogether.
Do I learn to actually make a wig, or just install one?
Make one. Module 4 covers cap construction from measuring the head, sewing wefts by machine and by hand, attaching the closure or frontal, and securing combs and the adjustable band, then customising the lace and installing it glueless. Made-to-order units are a separate revenue stream from install fees, and the pricing lesson treats them separately.
Is bleaching knots safe?
It is a real technique with real risks, and it is taught with those risks stated: what it does, the product-safety cautions, and how to protect the hair. The course also teaches the judgement call that matters more, which is that sometimes less customisation is the safer and better choice. Not every unit needs bleached knots.
Why does the sew-in module take three weeks?
Because the stitch and the blend reward slow, supervised repetition more than anything else in the program. A rushed stitch lifts. A rushed blend is visible from every angle. Three weeks means you can do it badly, be corrected by hand, and do it again, which is what in-person training is actually for.
I am a licensed hairstylist. Is this useful to me?
It is built to be. Diploma programs in this province generally cover cutting, colour and chemical services and do not cover braid-downs, closures, frontals or textured-hair install work. If your clients are asking for services your training did not include, this is the gap. Note that this certification is a professional skills certificate and does not extend or replace any licence you already hold.
Do I need to take Foundations first?
No. There is no entry requirement for this certification. Anyone with enough experience can apply directly. Foundations is our recommended starting point for beginners, not a gate. For this track specifically, every sew-in and most wig installs sit on a cornrow braid-down, and yours needs to be genuinely flat. If it is not yet, start at Foundations.
Is this a cosmetology qualification?
No. This certification teaches install craft and small-business skill. It is a professional skills certificate, not a cosmetology credential, not a provincial trade certificate, and not a licence. Read the honest answer on Alberta’s rules.
What if I miss a session?
See refunds and rescheduling for the current policy.
Where this leads next
Certified Salon Business Professional is the natural pairing. Installs are your highest-ticket service, and this is the pricing, systems and operations training that turns high-ticket work into a business. It is online, self-paced, and open to any experience level.
Cornrows and Feed-Ins Specialist sharpens the thing every install sits on. Advanced parting and tension control make every braid-down under every install better.
Crochet Specialist adds a fast, lower-ticket service to balance a book full of long install days.
What this credential is, and what it is not
Celegant Braiding Academy issues a professional skills certificate. It is awarded by us, based on assessed practical work. It is not a provincial trade certificate, not a government licence, and not an apprenticeship credential.
In Alberta, Hairstylist is a compulsory-certification designated trade. Braiding is not named specifically in the government sources we reviewed, and we will not guess on your behalf. The authoritative answers live with the province:
- Restricted Activities List, Hairstylist, Alberta Apprenticeship and Industry Training: tradesecrets.alberta.ca
- Barber and Hairstylist certification in Alberta: alis.alberta.ca
- Apprenticeship and Industry Training Client Service Offices: call them and ask about your exact situation.
If your plan is to cut and chemically treat hair as a licensed hairstylist, the apprenticeship route is the one you want, and we will tell you that plainly. Our program is for braiding, twisting, locing, crochet and install work, and for the business skills that go with them.
Educational information only. This is not legal advice.
Not a cosmetology qualification. This certification teaches install craft and small-business skill. It is a professional skills certificate. It is not a cosmetology credential, and it does not extend or replace any licence you already hold.
Scalp and hair safety. Tension, traction, adhesive and scalp-health guidance in this program is educational and is taught for the safe practice of protective styling and install work. It is not medical advice. Refer clients with hair loss, scalp conditions or suspected reactions to a physician or another qualified professional.
Ready?
Download the full curriculum: every module, every lesson, the four foundation patterns, the safety protocol and the assessment standard.